Parallel Flow Evaporator for Automotive AC – High Efficiency & Corrosion Resistance
May 12, 2026
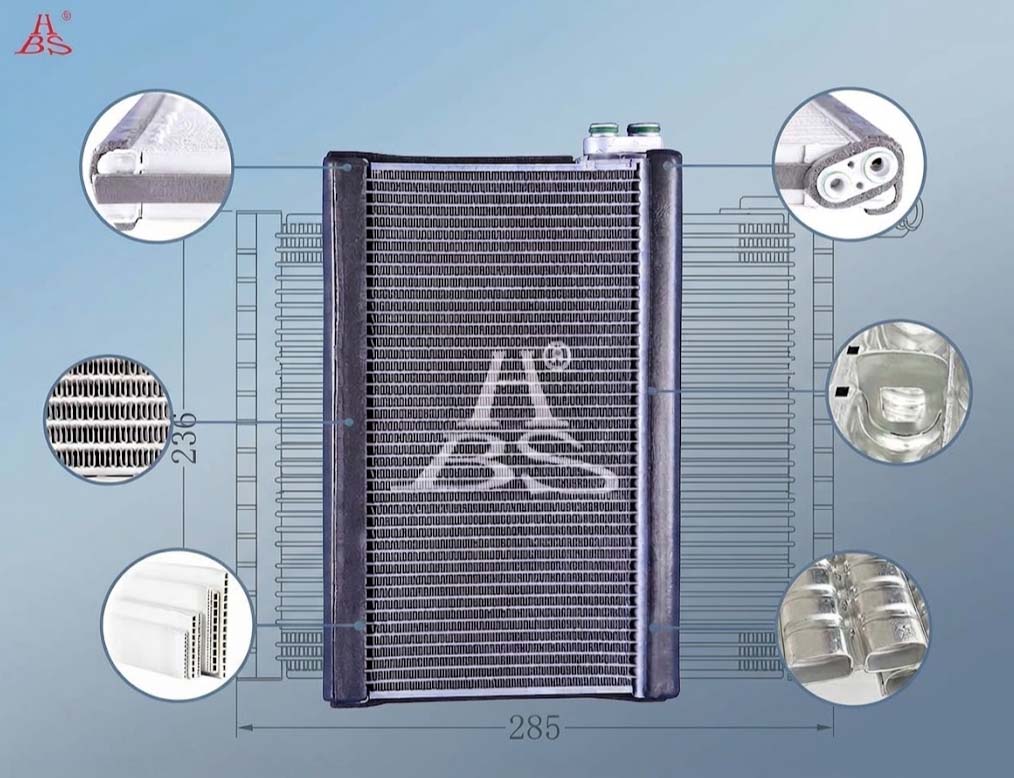
In an automotive air conditioning system, the performance of the evaporator directly affects the vehicle's cooling effect, energy consumption, and user experience. The parallel flow evaporator is a modern evaporator type featuring optimized structure, high heat exchange efficiency, and strong reliability. It consists of several precision components, including side plates, flat tubes, fins, baffles, end caps, connector blocks, and connecting pipes. Each part is rigorously designed and manufactured to ensure stable operation of the entire system.
Multiple Tube Sizes to Meet Different Vehicle Requirements
Different vehicles vary significantly in space layout and cooling operating conditions. To address this, HBS offer a range of tube sizes, including 35mm, 38mm, 45mm, and 50mm, combined with differentiated flow path designs. This allows flexible adaptation to various air conditioning system requirements, from compact sedans to large commercial vehicles. Whether dealing with limited front compartment space or operating conditions demanding higher cooling capacity, we can provide a suitable matching solution.
HBS products cover many mainstream vehicle models, including but not limited to: evaporator for Ford Focus,evaporator for Isuzu D-max,rear evaporator for Tesla Model X and evaporator for Toyota Corolla.Whether you need replacement parts for older models or dedicated evaporators for new energy vehicles, we can supply precisely matched products.
D-tube 45mm
Evaporator For Ford Focus 2015
Denso Type 38mm
Evaporator For Isuzu D-max 2020
D-tube 35mm
Evaporator For Tesla Model X Rear
Denso Type 38mm
Evaporator For Toyota Corolla 2007-2014
Precision Flow Path Design for Efficient Heat Exchange
The core advantage of the parallel flow evaporator lies in the precise coordination of its flow path structure. The multi-port flat tubes work together with the manifolds and baffles to form an efficient and stable refrigerant flow path. Through the strategic placement of baffles, the direction of refrigerant flow can be precisely controlled, achieving performance improvements in the following areas:
More uniform refrigerant distribution: Avoids local overheating or overcooling, improving the overall heat exchange efficiency of the evaporator.
Faster evaporative heat absorption: The refrigerant evaporates and absorbs heat more fully within the flow path, quickly reducing the temperature of the air passing through.
Significantly improved heat exchange efficiency: Provides higher cooling capacity within the same volume and weight, reducing compressor load.
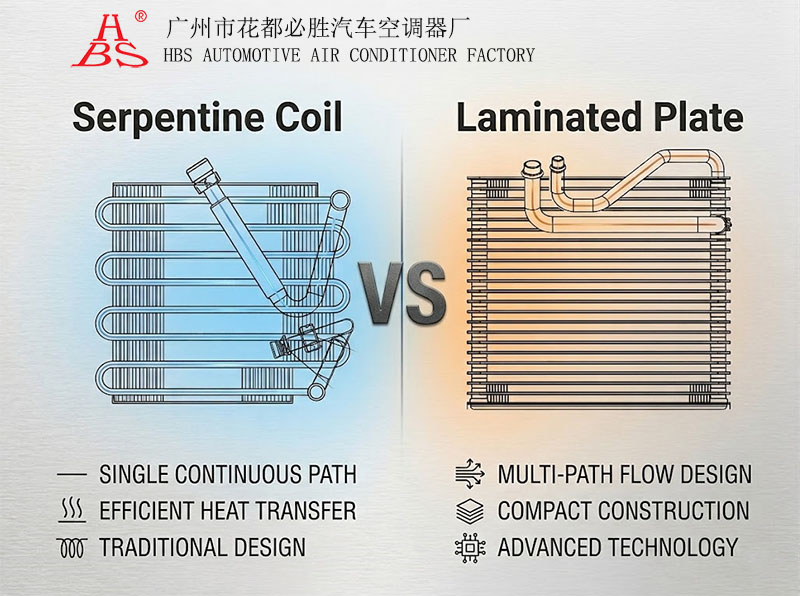
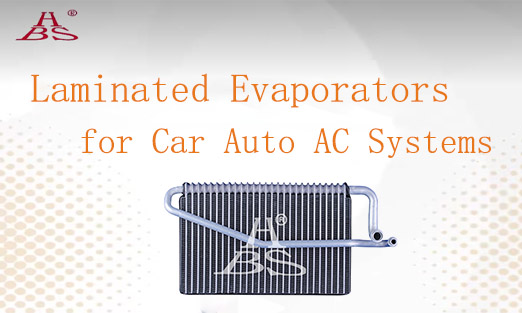
Significant Advantages over laminated evaporator
Although traditional laminated evaporators are widely used, they face the risk of internal leakage over long-term operation. Due to its fully welded structure and optimized flow path design, the parallel flow evaporator effectively avoids this problem while offering the following competitive advantages:
Lower leak rate: Strong structural integrity, fewer joints and weld points, higher reliability.
Better heat exchange performance: Greater heat exchange density per unit volume, contributing to system miniaturization and light weighting.
Longer service life: Excellent pressure and vibration resistance, capable of withstanding the complex operating conditions of long-term vehicle operation.
Professional Manufacturing, Quality Assurance
With its flexible size configuration and excellent heat exchange capacity, the parallel flow evaporator is an ideal choice for upgrading and supporting air conditioning systems in passenger vehicles, commercial vehicles, construction machinery, and new energy vehicles. HBS is a professional factory specializing in the manufacturing of automotive air conditioning evaporators and condensers. We have many years of industry experience, mature production processes, and a strict quality control system. Each parallel flow evaporator undergoes precision machining and performance testing to ensure stable, efficient, and reliable product delivery. We can also provide customized design and batch supply services based on specific customer requirements.
Frequently Asked Questions (FAQ)
1. Which vehicle models are parallel flow evaporators suitable for?
Specific examples include the 2007 Toyota Camry, 2016 Tesla Model X (rear evaporator), 2008 Toyota Corolla, and GAC Trumpchi GS8, among many other mainstream models. Through different manifold sizes (35mm–50mm) and flow path designs, they can flexibly adapt to various space and operating condition requirements.
2. What are the main advantages of a parallel flow evaporator compared to a laminated evaporator?
There are three main advantages:
higher heat exchange efficiency and faster cooling response;
the fully welded structure effectively avoids the risk of internal leakage;
better pressure and vibration resistance, resulting in a longer service life.
3. How do I choose the appropriate manifold size?
Selection is based on the vehicle's space layout and cooling capacity requirements. We offer sizes such as 35mm, 38mm, 45mm, and 50mm, combined with differentiated flow path designs, to help customers find the optimal matching solution.
4. What are the raw material advantages of your products?
We use high-quality aluminum alloy materials for key components such as flat tubes, fins, and manifolds. In particular, our flat tubes are made of zinc-containing aluminum material, which provides significantly enhanced corrosion resistance. These materials offer excellent thermal conductivity, corrosion resistance, and mechanical strength. High-quality raw materials not only ensure stable heat exchange efficiency but also significantly enhance the product's durability and reliability under long-term exposure to high humidity, high temperature, and high vibration conditions common in automotive applications.
5. How is product quality controlled?
HBS implement strict end-to-end quality control, from incoming raw materials to finished products. Each unit undergoes precision machining and performance testing to ensure stability, efficiency, and reliability.